Creating your first logbook template!
Available in: All subscription levels
If you are a new customer to Avero, the most popular first step is creating your logbook! If you are new to Avero you may not know exactly what you'd like to include, so this guide will show you the most popular choices our customers make in setting up a logbook template.
Want us to walk you through it? Try our pop-up walkthrough guide to activating your logbook. If you are an admin user, log into Avero on another tab in your browser and click this link:
Launch Logbook Setup Pop-Up Guide
Step One - Create a new template
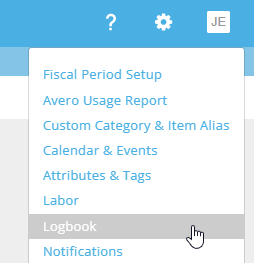
Click the gear icon in the top-right to open your Settings menu and select Logbook Setup.
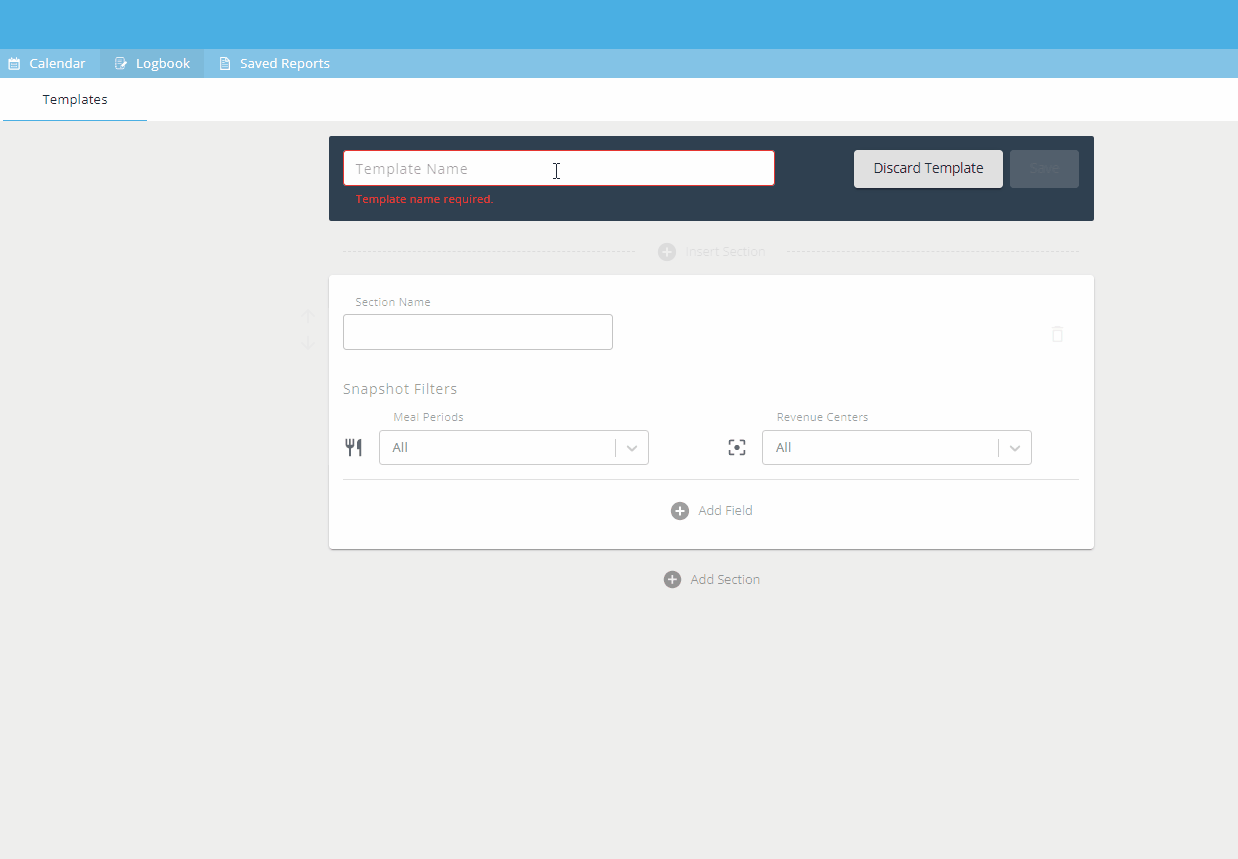
Click Create New Template
First, give your template a Name - this can be the name of the business or outlet, 'Shift Notes,' or simply 'Logbook Template'.
Next, name your first Section - usually the top section is name 'Main' or something similar to indicate that it will show all the day's revenue and include notes that cover the whole day of business.
Set the Snapshot filters for this section to All, to show all revenue. Don't worry, if you want to track revenue for specific meal periods or revenue centers we will add that next.
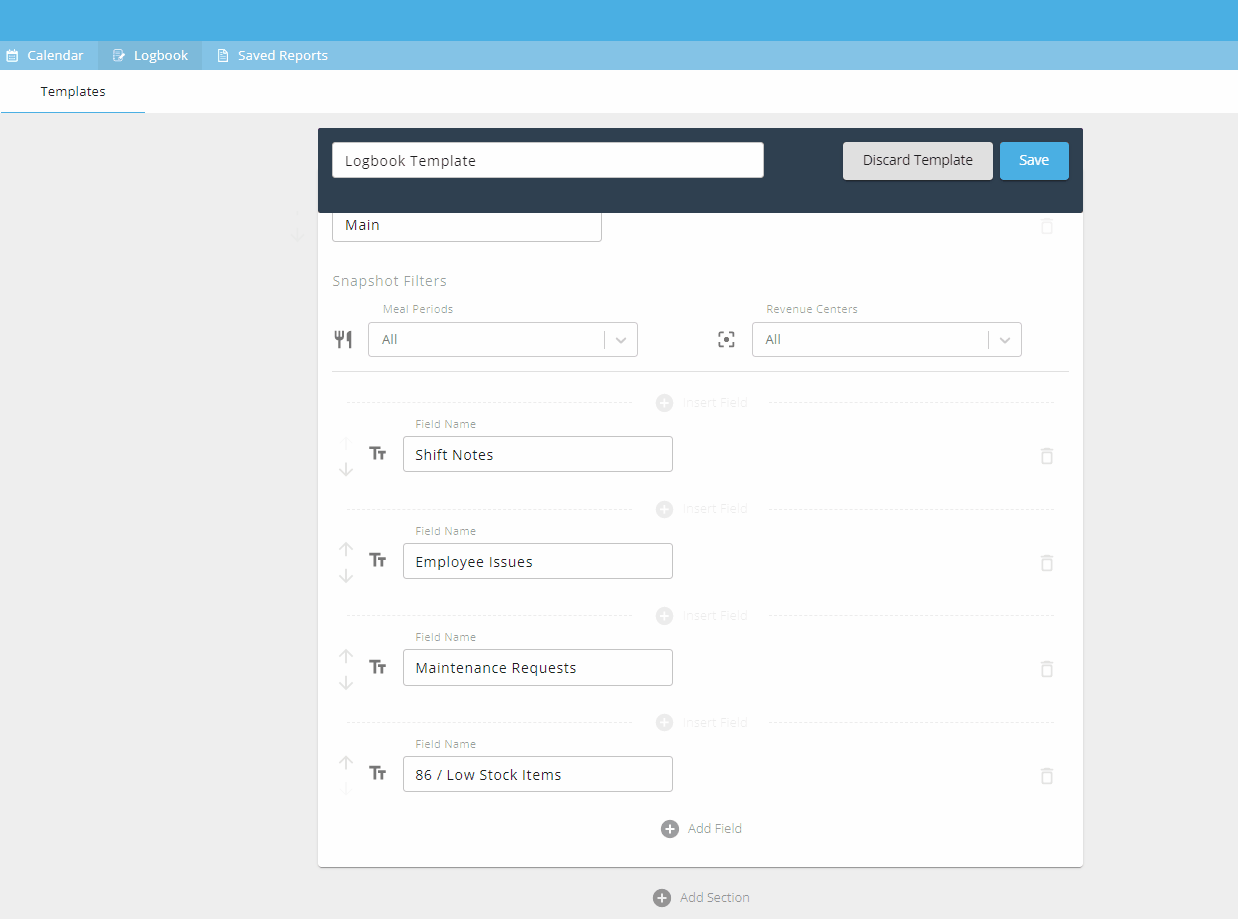
Now add the fields you want. Most of our customers include a few text fields to cover the day's notes. Popular choices are Shift Notes, Employee Issues, 86/Low Stock, Maintenance Requests, and so on. See the process for adding these here:
Congrats! You can Save your first logbook template! For your restaurant, this may be all you need. If you want to add additional sections to separate revenue and notes, you can see how to do that below. Lots of our customers like to see Lunch and Dinner in their own sections or see the Bar broken out. Keep watching to see how!
Select Add Section to add another section, which will include another revenue Snapshot - set the meal period you want to track and add your fields! You can also add checkboxes to track tasks you expect the team to complete during their shift!
What's next? Have your logbook send automatically to the team every day: Creating Logbook Emails
Want us to walk you through it? Try our pop-up walkthrough guide to activating your logbook. If you are an admin user, log into Avero on another tab in your browser and click this link:
Launch Logbook Setup Pop-Up Guide
Can I customize the Logbook sales snapshot to include specific metrics?
Each section in your logbook automatically includes a data snapshot for the day's sales - this can be filtered to specific revenue centers or meal periods, but the included metrics cannot be manipulated or customized. The logbook is a helpful place to combine shift notes and context with high-level sales information and a historical touchpoint - like Same Day Last Week or Same Day Last Year.
To customize or configure the sales information you need, turn to your sales reporting and analytics options in Aero! Your Avero reports are available to provide you with addition insight in how your business is operating and can be set up to be emailed daily, weekly or monthly and these reports can be configured and scheduled according to your business needs. You can also setup a dashboard(s) to view multiple saved reports on a single page upon logging in, like a Daily Sales Report.